home.health.love

A balanced and easy approach to healthy living.


Leave a comment

For Passover: Healthy + Kid-friendly + Matzah-free Dishes

Those celebrating the holiday of Passover can rejoice: you’ve made it halfway through the holiday eating one food group–Matzah.

With a few days left, here are some snack and meal ideas to change it up.

Healthy 2-ingredient pancakes

Gosh I just love these pancakes, and I make them year-round. They are fluffy, sweet, yummy, and nutritious. Best of all, they’re made of two natural ingredients: bananas and eggs. There’s no reason to save these for breakfast: with protein, fiber, potassium, and other vitamins and minerals, these are great for lunch and dinner, too.

The recipe is simple: Mash 1 ripe banana and whisk two eggs. Mix eggs and banana together and fry away, just as you would any pancake. I sometimes add 1/4 tsp vanilla for flavor (and you can also add chocolate chips, or whatever you enjoy in your pancakes). Easy? Yes! By the way, they’re so sweet they don’t need a topping, but we enjoy adding honey and berries.

Fish (or eggs) in a boat

Again, a year-round favorite. This is basically a substitute for wraps and sandwiches. Wash a romaine leaf and fill it with tuna fish salad, egg salad, babaganoush, guacamole, or whatever your kids enjoy. That’s it. I usually cut off the leafier top part, because my kids enjoy the crunchiness from the bottom half of the leaf.

Cauliflower rice

These days, you can find riced cauliflower in a bag at Trader Joe’s or make it yourself using a food processor. Cauliflower rise is simply a cauliflower minced up into rice-sized morsels. A simple sauté in oil with onions, plus some salt and your favorite spices is all you need to make this yummy. Add herbs and a squeeze of lemon juice if you so choose. If you want a specific recipe, this one is simple and great.
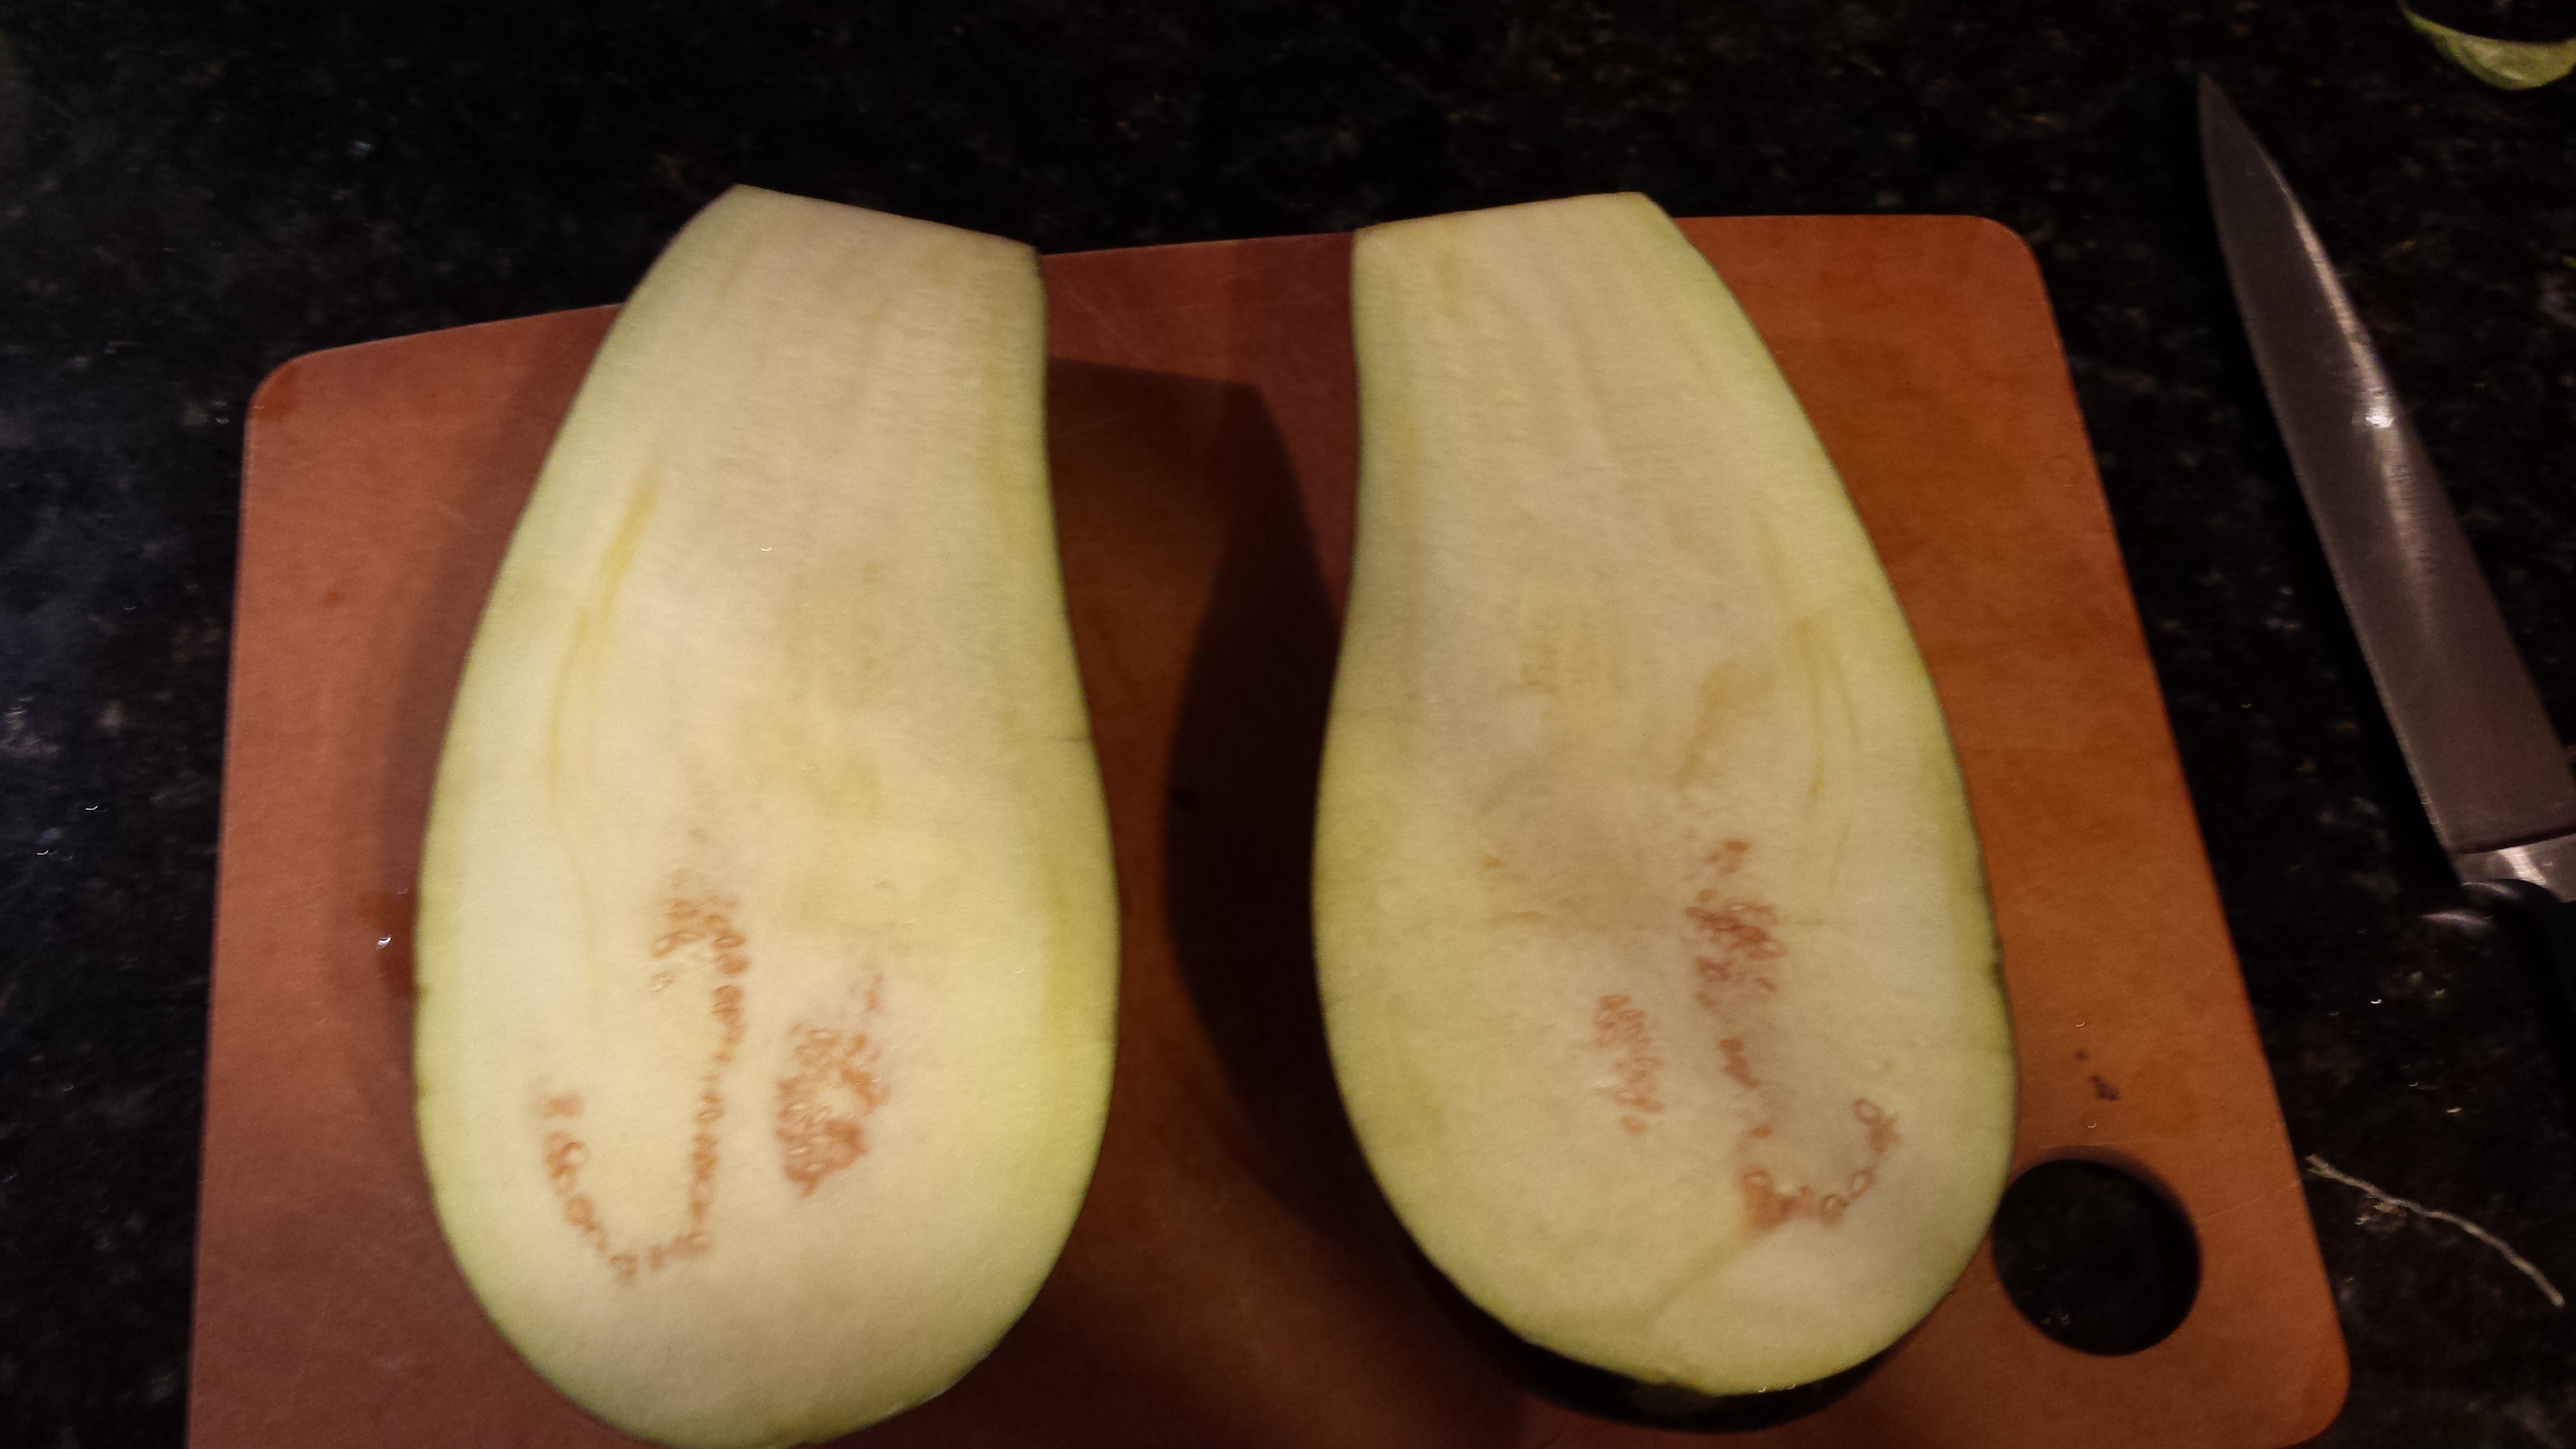
Spaghetti squash

I totally convinced my kids that spaghetti squash was actually a form of spaghetti. This is yet another easy, healthy option. I cut a spaghetti squash in half, remove the seeds, drizzle on some oil, and roast at 425 degrees (flesh-side down) until tender (usually about 30-45 minutes). Remove from oven and scoop out the flesh, which will come out like spaghetti.

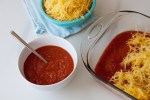
Then, all you gotta do is add tomato sauce like you would on pasta, spices to taste (I add garlic), and you can top with shredded mozzarella or Parmesan cheese (which you can melt for 30-60 seconds in the microwave. Done, nutritious, and yummy! If you want to get fancier and cheesier, here’s a riff on baked ziti using spaghetti squash!

Healthy chips

Healthy chips do exist. Don’t forget these year-round goodies. Kale chips (or try spinach chips–make them the same way you would kale chips) are awesome. Also, try to make chips with your favorite fruit, like these banana chips, which you can also do with strawberries or apples. The key with fruit chips is to keep the oven on a very low temperature, around 200 degrees, simulating a dehydrator. (Of course, if you have a dehydrator that is kosher for passover, use that instead!).


Leave a comment

Quick & Healthy Eggplant Parmesan (Gluten-free, too!)

A friend of mine was telling me recently that eggplant parmesan is one of her favorite foods…but she only makes it once a year. Why? Too much work! Slicing, breading, frying…it’s quite a labor intensive dish. (And usually not the healthiest one, either.)

But, no need to fear! Eggplant parmesan can be really quickly, easily…and, yes, healthfully prepared. The secret is not to fry the eggplant and to leave out the breadcrumbs…instead, just broil the eggplant! Another time saver: slice the eggplant lengthwise instead of into circles. Finally, I don’t bother to salt the eggplant in advance–this doesn’t seem to add to the flavor. Bottom line: no smell, no standing over the frying pan, no burning oil, no scrubbing caked-on greasy bits when you are done. Not only is it easier, but healthier to avoid frying. I also love how broiling eggplant brings out a smoky eggplant taste (it reminds me of baba ganoush).

Here’s a healthy, easy eggplant parm’ recipe for you, with a bunch of variations to make it interesting.

No-Fry Eggplant Parmesan

Ingredients:

2 eggplants

1 jar tomato sauce

1 16 oz. package shredded mozzarella

1-2 handfuls of minced basil for flavor and garnish (optional)

Olive oil

Salt, pepper

(Feel free to halve the ingredients if you only have one eggplant.)

Preparation:

1. Turn on your broiler (I put it on the high setting).

2. Cut eggplant lengthwise, in half. Slice each of the halves lengthwise, into approx. 1/4-1/8″ slices. (No need to make these slices too thin: I like them thick because I love the taste of roasted eggplant, I don’t want to hide it in cheese and sauce!). If you prefer slicing the eggplant into circles, then go ahead!

2013-08-14 19.15.26

2013-08-14 19.16.08

3. Drizzle baking pan(s) or cookie sheet(s) with olive oil. Place eggplant slices in one layer in pan or on sheet. Drizzle eggplants with olive oil. Season with salt and pepper, to taste. Put into oven and broil for 10-12 minutes. Take eggplants out when they are tender and browning, but not dried (then you left them in for too long).

4. Spray/drizzle bottom of lasagna dish with olive oil. (If you used a baking pan in the previous step, then you can now use it to make the lasagna!) Layer eggplant, tomato sauce, cheese and basil; repeat for 2-3 layers or until ingredients are used. End with garnish on top.

Variations:

1. Mediterranean style: instead of basil, used parsley and/or dill. Instead of mozzarella, used feta.

2. Zucchini parmesan: use zucchini or summer squash instead of eggplant. Follow directions, exactly. Yummy variety.

3. Zucchini-eggplant parmesan: use zucchini and eggplant!

4. Use fresh, diced tomatoes in addition to or instead of tomato sauce.

5. Use fresh, sliced mozzarella instead of shredded.

Photo Credit (1st photo): seriouseats. Silly me, when I made this last I forgot to take a photo of the finished product…by which I really mean, my family devoured the dish before I could think twice. But, my parm looked almost as nice as this one. 🙂


Leave a comment

For Summer’s Sake, Stop Cooking!

Many of us are in the habit of cooking dinner for our families. But, dinner doesn’t need to be a cooked meal, and summer’s the best time to avoid heating up the kitchen in already-high temperatures! Besides for the hot weather, here are other reasons not to slave over a hot stove: 1) it can be quicker and easier to prepare a meal, and 2) when you don’t cook, your food maintains most of its nutritional content.

So, here are some no-cook or (low-cook) ideas for filling and nutritious summer dinners:

Entree salad:

I often like to base my non-cook meals around a hearty salad. Salads can be tasting and filling when they have a protein included, like canned beans. (I always buy the organic kind from a company that does not use BPA in their cans, such as Trader Joe’s and Eden Organic.) Other ideas for an easy protein to add to your salad: sprouts (you can grow your own!), baked tofu, tuna, canned salmon, nuts (slivered almonds, crushed walnuts), seeds (pumpkin, sunflower), and cheese (goat, feta). Some easy-cook protein options are hard-boiled eggs and quinoa (it’s a grain, but it’s also a complete protein!). To fill out the meal, you can always add a side: a piece of whole-grain bread, a chilled soup. Easy and super healthy!

Summer Slaw:

An alternative to salad is making a slaw! When people think of “slaw,” they usually think “cole slaw,” or shredded cabbage with a mayo- or buttermilk-based dressing. Cabbage is super healthy, but slaws can also be made from all sorts of other shredded veggies and fruits, including broccoli, carrots, and kale. Further, the dressing does not have to be a heavy, dairy-based sort. Actually, lots of Asian dressings based on soy or peanuts work really well with slaws, as do tahini-based ones and different kinds of vinaigrettes. Like an entree salad, a slaw can be a meal in and of itself, or add some soup and another side if you desire.

If I haven’t convinced you yet, then I will now: slaws are super easy because you can already buy the ingredients shredded. Shredded cabbage, carrots, and broccoli are available in most supermarkets, and I’ve seen shredded kale, too.

Here’s a quick and easy slaw primer: combine shredded vegetable of your choice, with favorite nut or seed (pumpkin, sunflower, slivered almonds, and/or sesame), with favorite dried or fresh fruit (craisins, raisins, dried apricots, grapes, etc.), and an optional pungent (like scallions). Top with your favorite dressing.

Below is a dressing I found in a Moosewood cookbook (Fast and Easy Recipes for Any Day) that I like to use to make a tasty broccoli slaw (gets compliments every time).

Ingredients:

1 bag broccoli slaw (store-bought, approx. 12 oz)

Seed or nut of choice (sunflower seeds, slivered almonds)

1-2 cups Craisins, raisins, or fresh grapes

Optional: sesame seeds, scallions

2 tbs toasted sesame oil

2 tbs soy sauce

4 tsp honey

6 tbs lime juice (fresh, about 2 limes; or use store-bought)

salt, pepper to taste

Preparation:

1. Combine sesame oil, soy sauce, honey, and lime juice in a container with lid; add salt and pepper. Close lid and shake to mix ingredients.

2. Put shredded broccoli in bowl. Add ingredients from step 1 to shredded broccoli.

3. Top with chosen dried or fresh fruit, nuts, sesame seeds and scallions, to your taste. Mix together. Preferably, let sit for 20 minutes before serving.

Need more inspiration? I found  a bunch of yummy slaw recipes on the kitchn.

Chilled soup:

Yum. Summer is the season for my favorite soups. I love gazpacho (there are so many kinds!), and other chilled soups, like chilled strawberry soup, cucumber, or pea. Some soups you usually eat hot can be tasty when chilled, such as a corn-based, zucchini, or butternut-squash soup. Serve with a side of multi-grain bread with a spread of chumus or canned salmon salad and you are on your way to a filling meal!

Fresh Veggies and dips:

Why not? Cut up carrots, celery, cauliflower, zucchini, and/or pepper and offer it all up with a variety of dips: chumus, guacamole, tahini, nut butter (I like almond and cashew), or whatever floats your boat. Such dips are high in protein and very filling. Offering up a variety of dips makes it more fun and will likely increase the amount of veggies your kids/partner will consume.

Squash:

Ok, this one involves cooking, but you can plan ahead. Bake a few butternut squash halves drizzled in olive oil  in advance (say, on a Sunday evening), and then serve squash for a couple of dinners over the next few days. Basically, I love butternut squash topped with a protein. Top with tuna/salmon salad or egg salad; sprinkle with some feta or goat cheese; and/or add some nuts/seeds and dried fruit. You can eat it cold or heat it up a little before serving.

I hope these ideas can get you started on the no-cook bandwagon. What are some of your favorite no-cook dinners?


Leave a comment

Ode to Lentils

Lentils are a great food for so many reasons. They should be a staple of any vegetarian diet, but are a great addition to any food repertoire. They are a low-fat, low-cholesterol, nutrient-rich substitute for meat.

Here is what makes them so special:

  1. They build your iron stores! A cooked cup of lentils contains 37% of your daily nutritional value. Apart from fortified cereals and soybeans, lentils have the most iron of any non-meat food source (see Table 1 to compare). Many women have low iron stores (12% of young women!), which can result in anemia. Vegetarians are particularly vulnerable to low iron, because they don’t eat meat, which is a great source for iron, but even meat-eaters suffer from low iron levels! (Other iron sources: all varieties of legumes, nuts, dark leafy vegetables, tofu.)
  2. Unlike other legumes, lentils do not need to be soaked before cooking.
  3. They are less gas-producing than beans.
  4. They cook very quickly, quicker than other legumes! Boiling them takes about 15-20 minutes.
  5. According to a Harvard study women who ate beans and lentils at least twice a week had a 25 percent lower risk of breast cancer than women who ate them just once a month. (Source)
  6. They taste great when sprouted!
  7. They make a great toddler/kid food!
  8. Many varieties add different flavors and colors to your dishes: orange, green, brown, black, etc.

Below re two of my favorite recipe for making lentils is. The first is a great side or vegetarian main dish or lunch salad. It was featured in the August 2005 issue of Gourmet Magazine. It’s super easy and tasty. I have served it to company on many occasions and always get compliments.

Lentil Salad with Tomato and Herbs

Ingredients:

  • 1 cup dried lentils (preferably small French lentils)
  • 1 large garlic clove, chopped
  • 1 teaspoon salt, or to taste
  • 3/4 lb tomatoes, diced (2 cups)
  • 4 large scallions, thinly sliced (3/4 cup)
  • 1/4 cup chopped fresh dill
  • 1/4 cup thinly sliced fresh basil
  • 3 tablespoons red-wine vinegar, or to taste (I usually start with 2 tbs. and then add more)
  • 1/4 cup extra-virgin olive oil
  • 1/4 teaspoon black pepper

Preparation:

  1. Bring 4 cups water to a boil in a 2-quart heavy saucepan with lentils, garlic, and 1/2 teaspoon salt, then reduce heat and simmer, uncovered, until lentils are just tender, 15 to 25 minutes.
  2. Drain in a large sieve, then transfer to a large bowl.
  3. Toss hot lentils with tomatoes, scallions, dill, basil, vinegar, oil, pepper, and remaining 1/2 teaspoon salt, or to taste.

Easy…right??? By the way, you can adjust this recipe by including whatever herbs and veggies you have in your frig. If you don’t have any fresh herbs, it still tastes great with the dried versions or none at all! 

Lentils with Rice (Mujadara)

Here is another favorite: a one-dish meal for a weeknight dinner, which can be prepared ahead. This recipe is adapted from one presented on Good Morning America. It’s so easy, that after making it once, you won’t need the directions anymore.

Ingredients:

  • 1-3 medium yellow onions, peeled
  • 3 tbs. olive oil
  • 1 cup lentils
  • 3 1/2 cups cold water or broth
  • 1 cup rice of your choice (sometimes I use quinoa)
  • 2 tsp. salt
  • OPTIONAL: Other seasonings of your choice: cumin, turmeric, curry, paprika, etc.

Preparation:

  1. Dice 1-2 onions.
  2. Heat a large frying pan and add 2 tablespoons of the olive oil and the diced onions. Saute until quite brown and set aside.
  3. In a 4-quart covered pot place the lentils and water/broth. Bring to a boil, covered, and then turn down to a simmer. Cook for 15 minutes.
  4. Add the cooked onion to the lentils, along with the rice and salt. (Add any optional seasonings.) Cover and simmer 20 minutes until rice and lentils are soft. If a bit of water remains unabsorbed, remove from heat and let stand 5 minutes and it will soak in.
  5. OPTIONAL: Slice the remaining onion into rings. Heat the frying pan again and saute the rings in the remaining olive oil.
  6. OPTIONAL: To serve, top the lentils with the sauteed onion rings.
  7. Accompany with plain yogurt, sour cream, or tzatziki sauce. Consider adding a lemony green salad, with tomato wedges on the side.

I sometimes make this recipe when I already have cooked rice or quinoa, in which case I cook the lentils alone according to step 3; when done, I put the lentils in the frying pan with the sauteed onion and additional olive oil, add the cooked rice, and saute it altogether for a few minutes.

Enjoy!


3 Comments

Almond-Butter & Almond-Pulp Recipes

Almond-coconut macaroons

Almond-coconut macaroons

There are so many uses for almonds! I previously posted about how to make almond milk. If you follow the proportions I suggested, you’ll end up with nearly 3 cups of almond pulp. Waste not, want not: there are many great things you can make with the pulp! I’ve found that almond pulp lasts about 3-5 days in my fridge. So, if you don’t expect to use your pulp soon, just freeze it for later use. I’ve done this many times before and it works great!

Before I get into some ideas of what to do with your almond pulp, I wanted to briefly discuss making your own almond butter. Almond butter is a staple in my house. We just love it on waffles or toast with a sprinkle of honey or sliced bananas on top for breakfast. It’s also great in a sandwich with jelly. You can use it as a substitute for peanut butter in recipes.

Why eat almond butter instead of peanut butter? Well, apparently, almond butter has 25% less saturated fat, plus 26% more Vitamin E, 3% more Iron, and 7% more Calcium than peanut butter. It’s higher in magnesium, phosphorus, potassium and antioxidants (source; please note: I have not fact-checked this myself). Also, almonds are alkaline and peanuts are acidic. (Balancing your body’s ph with alkaline foods is supposed to promote overall health. This will be the topic of a future blog post!)

Here’s the super-easy “non-recipe” for almond butter: place one or two cups of unsoaked almonds (preferably raw and organic) in a food processor with the S blade. Process, scraping the sides down frequently. This could take about 10 minutes or more, but you’ll soon witness your almonds going from a flour-like consistency to a smooth spread. Add sea salt to taste. Store in the fridge. Apparently it can last for a few months. Yum!

Now, for the long-awaited almond pulp recipes!

I haven’t found and tried too many almond-pulp recipes. There are many baked goods that you can make with almond flour, which is NOT the same as almond pulp. But, you can make almond flour out of your pulp if you wish. I’ll tell you how, below, and give you some easy and tasty ideas of what to do with the pulp.

Almond flour recipe: if you have a dehydrator, then place the almond pulp on a teflon-lined tray and dehydrate at 115 degrees for 4-8 hours. Most of my readers probably don’t have a dehydrator. Instead, you can use your oven: set it to the lowest temperature possible, line a baking tray with parchment paper, and spread out the pulp. You will need to let it “bake” for about 3 hours. If you don’t have little ones running around, keep the oven door slightly open to let the air circulate better. Once the pulp is completely dried out, put it in your food processor to make it into a fine flour and store in your freezer. Use as needed. You’ll find tons of almond-flour recipes online.

Almond-coconut macaroons: I adapted this Martha Stewart recipe. The macaroons I made were more like almond-coconut balls, probably because the original recipe uses crushed almonds, which are dry, whereas almond pulp is a bit damp.

Ingredients:

2.5- 3 cups of almond pulp (i.e. yield from my almond milk recipe)
2 cups unsweetened shredded coconut
1/2 cup coconut nectar, agave, or maple syrup
6 egg whites
2 tsp. vanilla

Preparation:

  1. Preheat oven to 350 degrees. Line two baking sheets with parchment paper.
  2. Whisk together eggs and sweetener. Stir in remaining ingredients.
  3. Form into mounds. I use a measuring spoon (1 tbs size) to capture a heaping scoop of the dough, then rolled it into a ball, and placed it on the parchment paper. Keep the balls 2 inches apart.
  4. Bake until macaroons are slightly browned around the edges, about 15 minutes. Let cool.

Variations:

  • Lemony-coconut macaroons: Add 2 tbs lemon zest into the mixture,
  • Chocolate surprise: Stick a chocolate chip into the middle of each ball.
  • Chocoholics anonymous: Drizzle finished product with melted chocolate. You can refrigerate so the chocolate sauce hardens.

Zucchini-Almond Hummus: A found a recipe for this on a blog I like to read. I adjusted it slightly.

Ingredients:

2 cups almond pulp
2-3 large zucchini, chopped
1 clove garlic
3 tsps cumin powder
1 tsp salt  or to taste
Black pepper to taste
Juice of 1 large lemon
Fresh herbs (parsley, dill, cilantro, etc.; whatever you have on hand)
Water

Preparation:

  1. Place all ingredients into high-speed blender. Use tamp to push down the mixture so it blends well. 
  2. If mixture is too thick for blending, add water or vegetable broth, tablespoon by tablespoon, until ingredients blend well.
  3. Blend well and adjust seasonings and herbs to taste.

Banana-Chocolate Freezer Fudge: I have not yet tried this recipe, but it looks too good to pass up. Once I try it out, I will update the post.

Please, feel free to offer an feedback/tweaks to the recipes provided here, or suggest new ones, in the comments section.


Leave a comment

Quick and Easy Winter Soups

Carrot and celery root soup

Carrot and celery root soup

Soups are one of the most nourishing foods during winter time. You can make them in 30 minutes or less, with just about 10 minutes of hands-on time. They are also the most forgiving type of food you can make: you can overcook them, and it’s no big deal; you don’t need to cut up all the ingredients in perfectly-sized portions; and, bottom line, unless you over-salt, it’s hard to go wrong. Plus, they refrigerate well, so one batch will last a few days or more. Added bonus: thicker soups work well as baby food!

If you have a few soups you can make in under 30 minutes, then you are good for the whole winter.

I wasn’t into making soups until I attended a cooking demo by a healthy-food chef and realized how easy they were to make. Until then I had been intimated by the whole process. So, what I hope to do is to de-mistify soup-making for you. I also want to give you some ideas for ingredients, and most of all: provide you with a “template” for making all sorts of creamy, vegetarian soups. I say “template” and not “recipe,” because a template gives you lots of flexibility and encourages you to experiment. With the template, below, you can vary the ingredients, but the steps are more or less the same! This means that you no longer have to spend time searching and following recipes. Once you get the hang of using this template, the whole process will become second nature to you.

NOTE: A major time-saver for making soups is using store-bought stock. Making your own is great, but it takes a while and needs to be done ahead of time. I’d never make soups if I had to make my own stock every time. Instead, I use Pacific’s organic, low-sodium vegetable stock. It comes in 1-quart cartons, and I keep at least 3 in my pantry at all times. I prefer Pacific over other brands because every single ingredient in the Pacific stock is either water, a vegetable, herb, or sea salt. Other brands have additives in them. Pacific broth is available in most supermarkets.

Quick and Easy Winter Soup Template

Equipment:

Pot (6 quarts or more)

Immersion blender (I have something similar to this)

Ingredients:

Olive oil

Aromatics (onion, leek, and/or garlic; chopped)

Vegetable # 1 (one root, squash, or cruciferous vegetable; chopped)

Vegetable # 2 (another root, squash or cruciferous vegetable; chopped) (optional)

Leafy Green (kale, spinach, collards, chard, etc.; chopped) OR fresh herb (parsley, dill, etc.; minced) (optional)

Salt and pepper (along with other optional spices: cumin, coriander, turmeric, etc.)

Vegetable stock (4-6 cups home-made or one box store-bought plus water)

Preparation:

  1. Sauté aromatic (onion or leek) in a few tablespoons of olive oil for 5 minutes on medium heat. If adding garlic (I usually do, because of it’s immune-boosting properties), then add it when you have 2-3 minutes left of sautéing.
  2. If using flavorful spices other than salt and pepper, add them while sautéing oinions. Think: cumin, coriander, turmeric, paprika, a dash of cayenne, etc.
  3. Add Vegetable # 1 and Vegetable 2, if using second vegetable.
  4. Add 1 quart of vegetable stock (one store-bought container) to cover vegetables. If there is not enough stock to cover vegetables, then add additional stock or water. (I often add water so I don’t have to open another container of broth).
  5. Bring soup to boil, then reduce heat to low and simmer for 20-30 minutes, or until vegetables are soft enough to purée.
  6. If adding leafy green or fresh herb, add to top of pot at the end of cooking time, and let it steam for a a few minutes on top of other vegetables. Do not mix in. This way, you are not over-cooking it and destroying valuable nutrients. It will turn a bright green color when ready.
  7. Use immersion blender to purée soup. Add salt and pepper, and adjust other spices, to taste. Add stock for desired consistency.

NOTE: if making baby food, you should err on the side of less stock so it’s not too thin. You can use one pot to make both baby food and soup. Simply, make soup using less stock and purée until you reach desired baby-food consistency. Then, remove a portion enough for baby. Finally, add more stock to put and purée until desired consistency has been achieved for rest of family.

Ideas for Soup Ingredients

Below are some ideas for soup ingredients that you can use with the above template. This is my personal repertoire of soups: easy-to-find ingredients, tasty, and affordable in the organic versions. You can follow my suggestions, or use them as inspiration for your own recipes.

For a nicely formatted pdf of the table below, click here: Soup Ingredients

Aromatic
(I add garlic to everything)
Veggie #1 Veggie #2 Leafy Green or Fresh Herb Spices/ other (use salt and pepper for all)
Leek
(2-3 stalks)
Potato
(approx. 2 lbs)
Parsley and/or chives
Leek
(2-3 stalks)
Cauliflower
(1 large head)
Parsley and/or chives
Onion
(1 large)
Cauliflower
(1 large head)
Kale, chard, or spinach (I bunch or a few handfuls) dry white wine (I cup) (optional)
Onion
(1 large)
Butternut Squash (approx. 3 lbs.) 1-2 tart apples (optional)
Onion (optional) Carrot
(approx. 2 lbs)
Celery Root
(1 large root)
Cumin, coriander OR few tbs’s sherry
Onion (optional) Carrot
(approx. 2 lbs)
Ginger
(2 tsps. or to taste)
Onion Carrot
(approx. 1 lb)
Yam
(approx. 1 lb)
Cumin, coriander

I’d love to hear about your favorite, go-to soup recipes; please share in the comments!


8 Comments

Almond milk made by YOU!

This recipe produced two 24-oz jars of almond milk, plus about 2 cups of pulp, on the right.

This recipe produces about two 24-oz jars of almond milk, plus about 2 cups of pulp.

We go through a LOT of almond milk in my house. Every time I shop I find myself picking up a few containers. My daughter loves drinking it in a glass, as does my husband, and we all enjoy it with our cereal.

But, I always feel a pit in my stomach whenever I glance at the side of the box. Preservatives, additives, who knows, even in the organic kind. So I decided, I’d make it myself!

The good news is that it is INCREDIBLY easy to make at home! I buy (A LOT of) organic, raw almonds from Wholefoods in the bulk aisle, which I keep in a gallon Ziploc bag. I’m in the process of looking for a cheaper bulk option, so I’ll keep you posted.

Equipment:

Glass jar or other container with cover

Blender (Vitamix is perfect, or another powerful blender)

Cheese cloth bag (like this one) or a fine mesh strainer

Large Bowl

Ingredients:

Two cups almonds

5 to 6 cups water

Vanilla extract (optional)

Sweetener, such as agave, coconut nectar (my choice), maple syrup, or honey (optional)

Preparation:

  1. Soak almonds 8-12 hours. (I usually put them to soak before bedtime or in the morning to make in the evening). To do this, simply put them in a glass jar or other container, fill with water, cover, and place in the fridge.
  2. After soaking is completed, rinse almonds in cold water.
  3. Place almonds and 5 cups water into blender. (If you have a small blender, you may have to do this in batches.)
  4. Add 1 Tbs sweetener of choice. (You may add another Tbs if you prefer added sweetness.)
  5. Add 1 Tsp vanilla extract (optional).
  6. Blend on high for 30-60 seconds, or until liquid gets creamy white. You will see pieces of almond pulp floating around.
  7. Use spoon to skim off some milk from the top to taste. Add more water (up to an additional cup), vanilla and/or sweetener to taste. Blend for 10 seconds.
  8. Please cheese cloth or strainer over large bowl. Poor almond milk into cheese cloth bag and squeeze out the milk; or poor into sieve and wait for the liquid to drip through. The pulp will be caught in the bag or sieve. Discard pulp or save for use in other recipe.
  9. Transfer the almond milk (and pulp, if you are saving it) to glass jars and refrigerate. Pulp can also be frozen for later use. Almond milk can last up to about 5 days; pulp will last a few days.

That’s it. It is so good, right? And I just love the creamy white color! After making your own milk a couple of times, you will figure out exactly how much water and sweetener you like. Making it will become like second nature to you. If you don’t drink a lot of almond milk, feel free to halve the recipe.

Stay tuned for a future post on what to do with the leftover almond pulp!

Enjoy!